The Overview of 2014 F150 Cabin Air Filter
This new solution from Infinity Overland is the only kit of its kind on the market. This 2014 f150 cabin air filter kit installs under the cowl of the truck where the system draws in air. The 12th generation F150 (2009-2014) did not come installed from the factory with a cabin air filter. Which is crazy to think that this was the generation that the SVT Raptor was introduced. If you have a need to keep your truck from being filled with dust, pollen or anything you would like to keep out, Infinity Overland has you covered.
Pros of the 2014 F150 Cabin Air Filter
- Only kit on the market
- Kit comes with everything needed for the install
Cons of the 2014 F150 Cabin Air Filter
- Requires a bit more work to install than just “changing” an air filter
What is Included in the 2014 F150 Cabin Air Filter Kit?
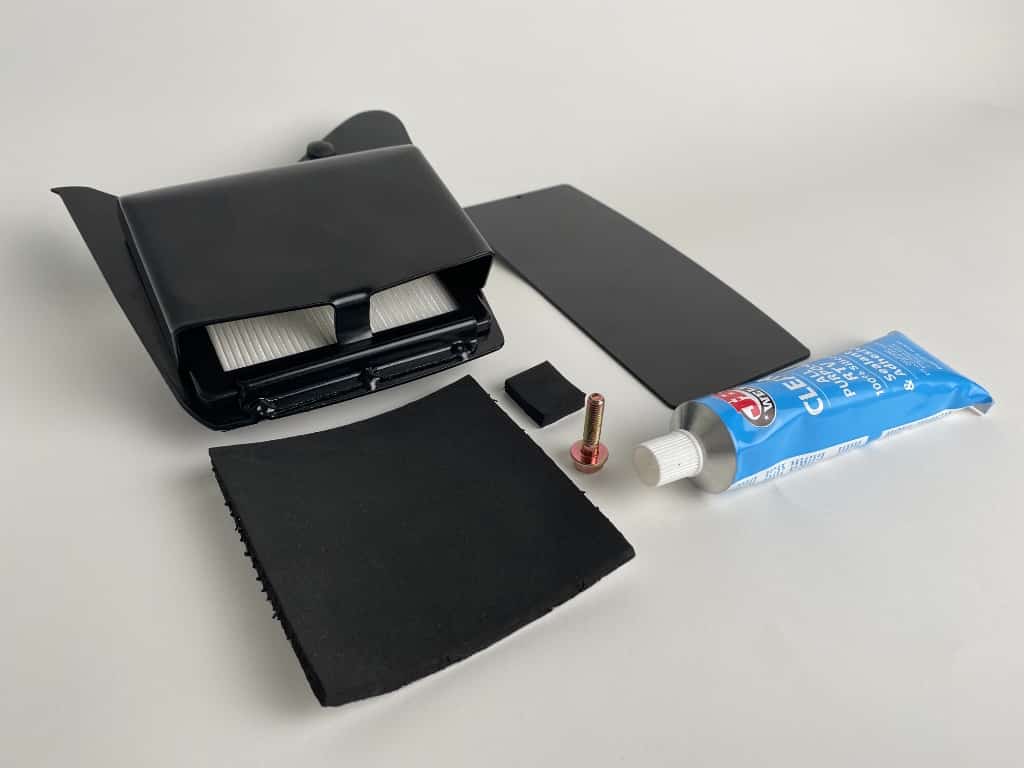
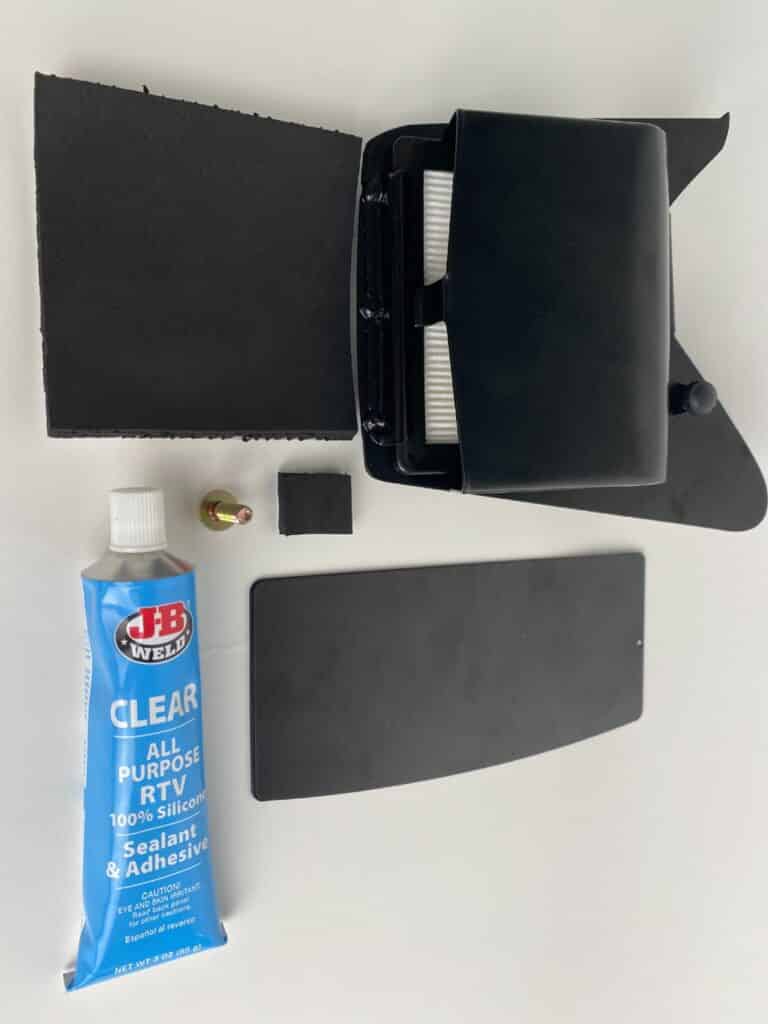
This kit has everything you need for the 2014 ford f150 cabin air filter install (minus the tools). Listed below are the detailed items that come shipped to you.
- HEPA Air Filter
- Filter Frame
- Filter cover
- Block off plate (only needed for 2009-2012)
- Large Foam Adhesive Pad
- Small Foam Adhesive Pad
- Replacement (shorter) Bolt for Window Wiper Assemply
- 1 tube of RTV sealant
2014 Ford F150 Cabin Air Filter Installation
Disclaimer: While I personally performed this work on my own vehicle, the reader should approach any custom work with caution and ensure they have the appropriate tools and skill level necessary to complete the work. Beyond the Raptor assumes no responsibility for damage caused while following this tutorial.
Tools Needed
- 10mm Deep Socket
- 10mm Thin Wrench
- 8mm Socket
- 4” extension
- Rachet
- Utility knife
- Panel removal tool
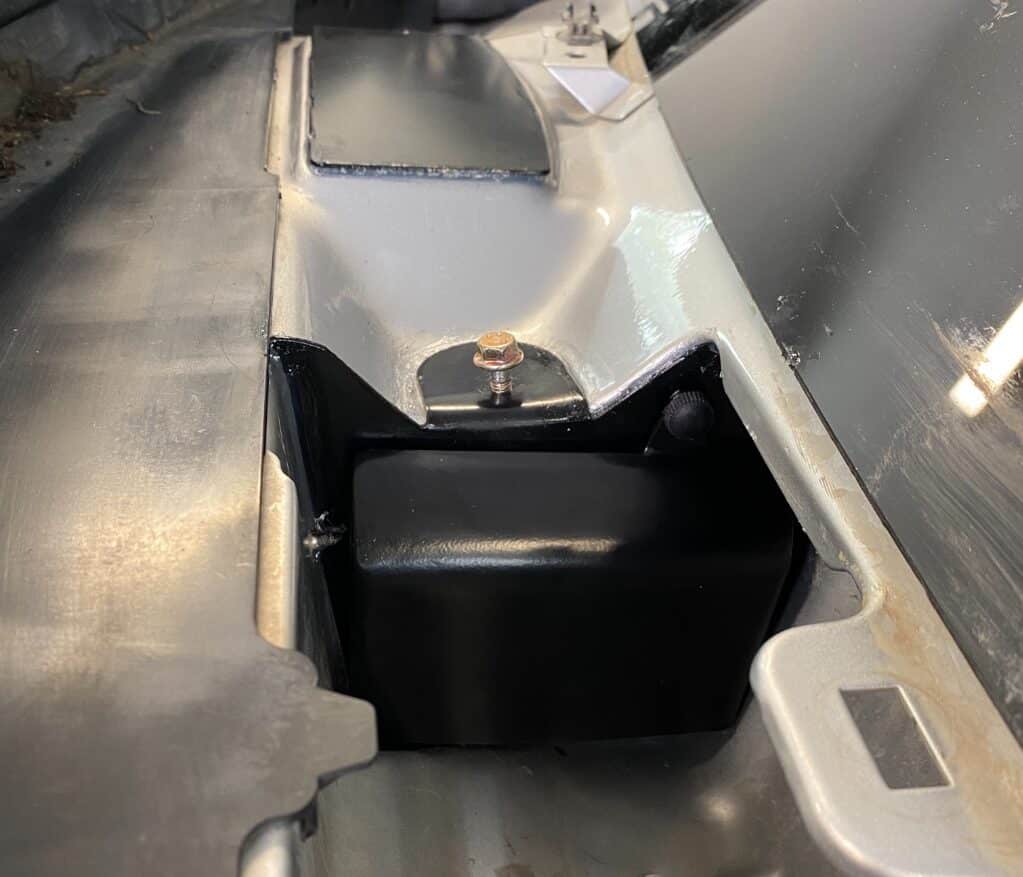
1. Seal The Area Around The Computer
To Remove the Onboard Computer
- Remove the onboard CPU plugs
- Remove 10mm bolts that hold the CPU
- Remove CPU and set aside
Use compressed air to blow out the cavity where the CPU sits & clean the surface with acetone to prep the surface for the foam adhesive
Pro Tip #1
Seal Area With provide Foam Pads
- Clean Area Well before installing foam pads
- Install the large foam pad to the left corner of the cavity
- Work the foam well into the corner sealing the opening
- Install the small foam pad over the hole left of the CPU
- Re-install CPU

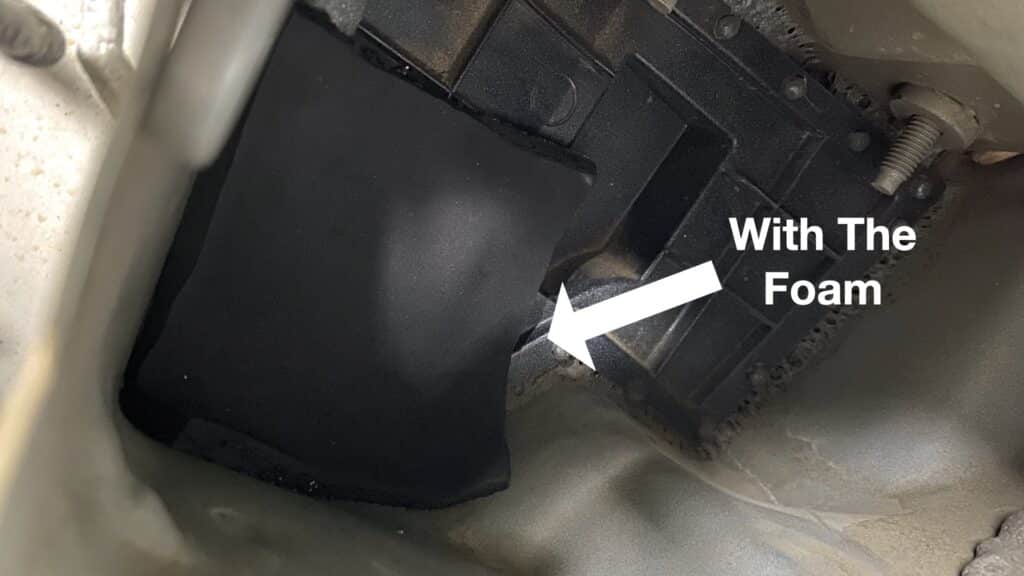
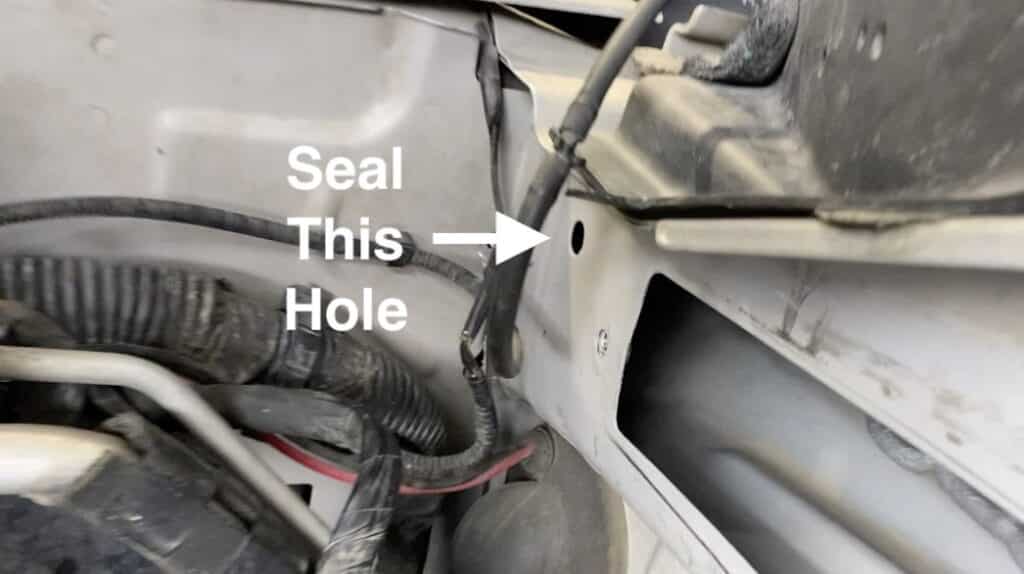
I noticed on my install there were a ton of leaves behind the CPU. This is where your HVAC draws in air… get the area cleaned out well.
2. Install Air Filter Under Cowl
Use a moving blanket over the hood to protect it while you work
Pro Tip #2
Disassemble the Cowl
- Remove both wiper arms (Pull level on the underside and pull up).
- Remove the 2 cowl push pins.
- Remove driver side cowl section first.
- Remove passenger side cowl section second.
- Disconnect the window motor electrical connector.
Install The Filter Frame
- Clean the area well with acetone and a rag.
- Dry fit filter frame and shell then remove.
- Use RTV provided and apply a generous bead around the leading edge of the metal where the filter frame will rest before installing the frame.
- Using the bolt provided and install the filter frame in place while the RTV drys
- Apply sealant around the edge of the filter frame. Do not leave any air gaps.
- Allow the silicone to dry for for at least 1 hr before moving on
Install Block off Plate
(2009-2012 model year only)
- Clear additional opening
- Apply a bead of silicon RTV on the edge
- Place the cover plate over the top of the opening
- Allow all silicone to dry for for at least 1hr before moving on
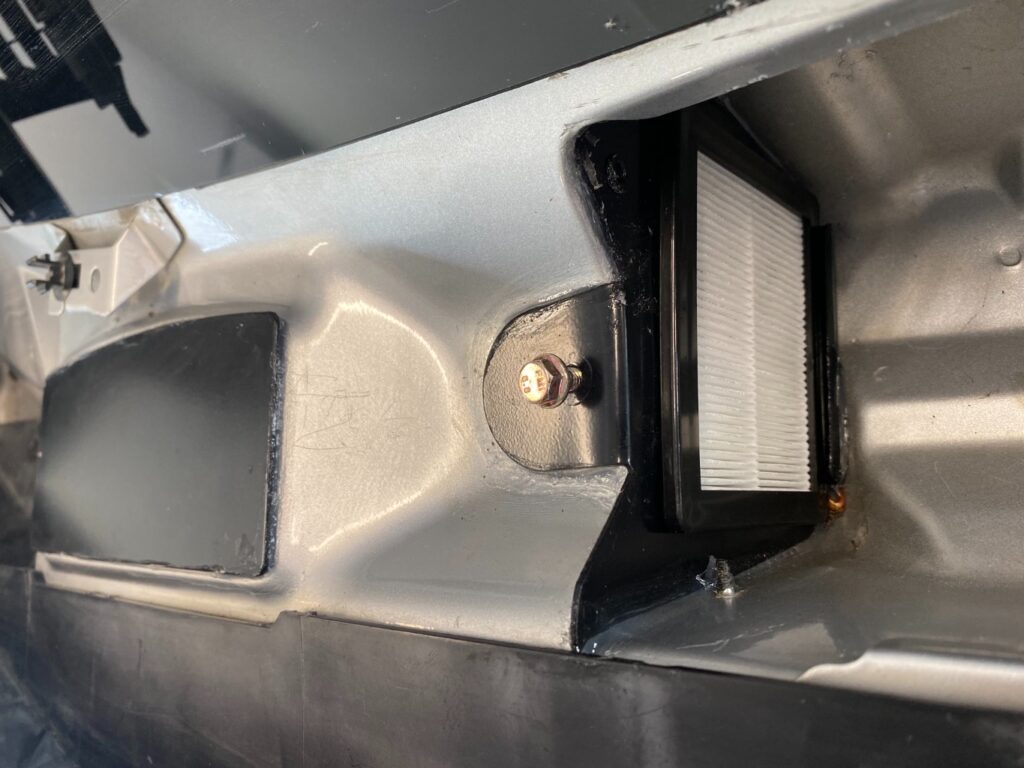
Reassemble the Cowl
- Install the provided HEPA filter and cover
- Re-install the wiper motor.
- You will need to use the provided bolt to do this. The provide bolt is shorter and will secure the wiper motor assembly and not pierce the filter
- Re-install the cowl and wiper arms
Final Thoughts
It works! I actually tested it by making up a batch of fog with dry ice (in the video). I’m mostly excited to rip through the desert with friends without worrying about covering the inside of my truck with dust. I would rate the 2014 ford f150 cabin air filter install a 6/10 in difficulty. Not as easy as I thought it would be, but mostly because I can be awkward working over the top of a truck hood since they are pretty large.
I’m excited to rip through the desert without worrying about the dust getting in!
Tony (Beyond The Raptor editor)
You can pick up one of these kits at InfinityOverland.com. Let us know in the comments what you think about the kit…
Additional Note from the Manufacture (I did not experience) :
Some people have experienced a slight reduction of flow from the fan as pulling air through the HEPA filter can cause a little drag, especially if there is crap still in the OE intake screen behind the computer. Removal of the OE plastic housing behind the computer is the only way to get at the fine mesh screen to clean it. Fair warning, the plastic housing on my 2013 was so brittle it just broke out when trying to remove it, however I’m glad I did as the screen was packed with crap I no longer wanted to breath!
Make sure and check other great reviews such as f150 headlights, f150 third brake light, f150 tailgate shock or f150 floor mats.